Best Foods
Fast Foods
Nice Food

Jumat, 12 November 2010

Baking on Hold


Accidents do happen. Unfortunately second time around for my poor left hand... First time, burnt by a fireball that exploded from my gas oven; this time, hot wax got splattered around the skin between my thumb and index finger.


The bandage the hospital wrapped on me makes my burn look so tragic (it's not as bad as it looks), but I guess it would help give a speedy recovery. Until then, I have to pause my baking sessions... :(


Bisou bisou,


Charlotte

Kamis, 11 November 2010

PANTALOON THE BAKING POODLE


There are three things that I love: vintage poodle illustration and objects, ANIMALS wearing human clothing... and CAKES. Combine the three and you have... PANTALOON! The best name for a poodle ever (Pants!). And look at his adorable face! He's a friendly guy! No scary looking poodle here!

If anyone ever sent this vintage children's book to me, I would be the happiest person ever!

Images from flickr.

Banana-Coconut Centered Chocolate Mousse


I've been meaning to make this cake for the longest time; finally, I've got around doing it. I encountered this concoction from a chef who once worked at one of my favourite patisseries back home. Unfortunately, I managed to loose the copy of the recipe, so I had to search hard on memory lane as to what components are in the cake and give my own take on this creation. I'm not sure if I got everything on my cake, but regardless, the cake was fantastic!


The cake is composed of layers of dacquoise, coconut jelly, caramelized bananas and milk chocolate mousse; it is then coated with a nice blanket of white chocolate ganache, then decorated with chocolate panels and chocolate curls. Yes, it seems like it has so much flavours going on, but it does come together nicely. Imagine a chocolate banana smoothie on a cake, but a lot lot better!


Bisou bisou,

Charlotte

Senin, 08 November 2010

Baker's Coconut Cut Up Cakes!

Perfectly cute. Looks like he's made of granola.

This Santa is just about the coolest cake dude on the block.
He knows it too.

Bllllassst off!!! We're goin' to Pluto! (My cake would say CANADA)

Beautiful indeed! Love those lines of dyed shredded sweetened coconut. And little dollies in jaunty caps riding up to the high heavens!

Minggu, 07 November 2010

IHCC: Halloween Spice Cake


This week's theme over at I Heart Cooking Clubs was "Out of Italy." This means that we were to find a Giada recipe that did not come from Italy. Not an easy feat, given that Ms. De Lauretiss has been dubbed "The Italian Princess" (Wolfgang Puck called her this on The Next Food Network Star this past season). Everything that was overtly from "somewhere else" just didn't appeal to me this week.

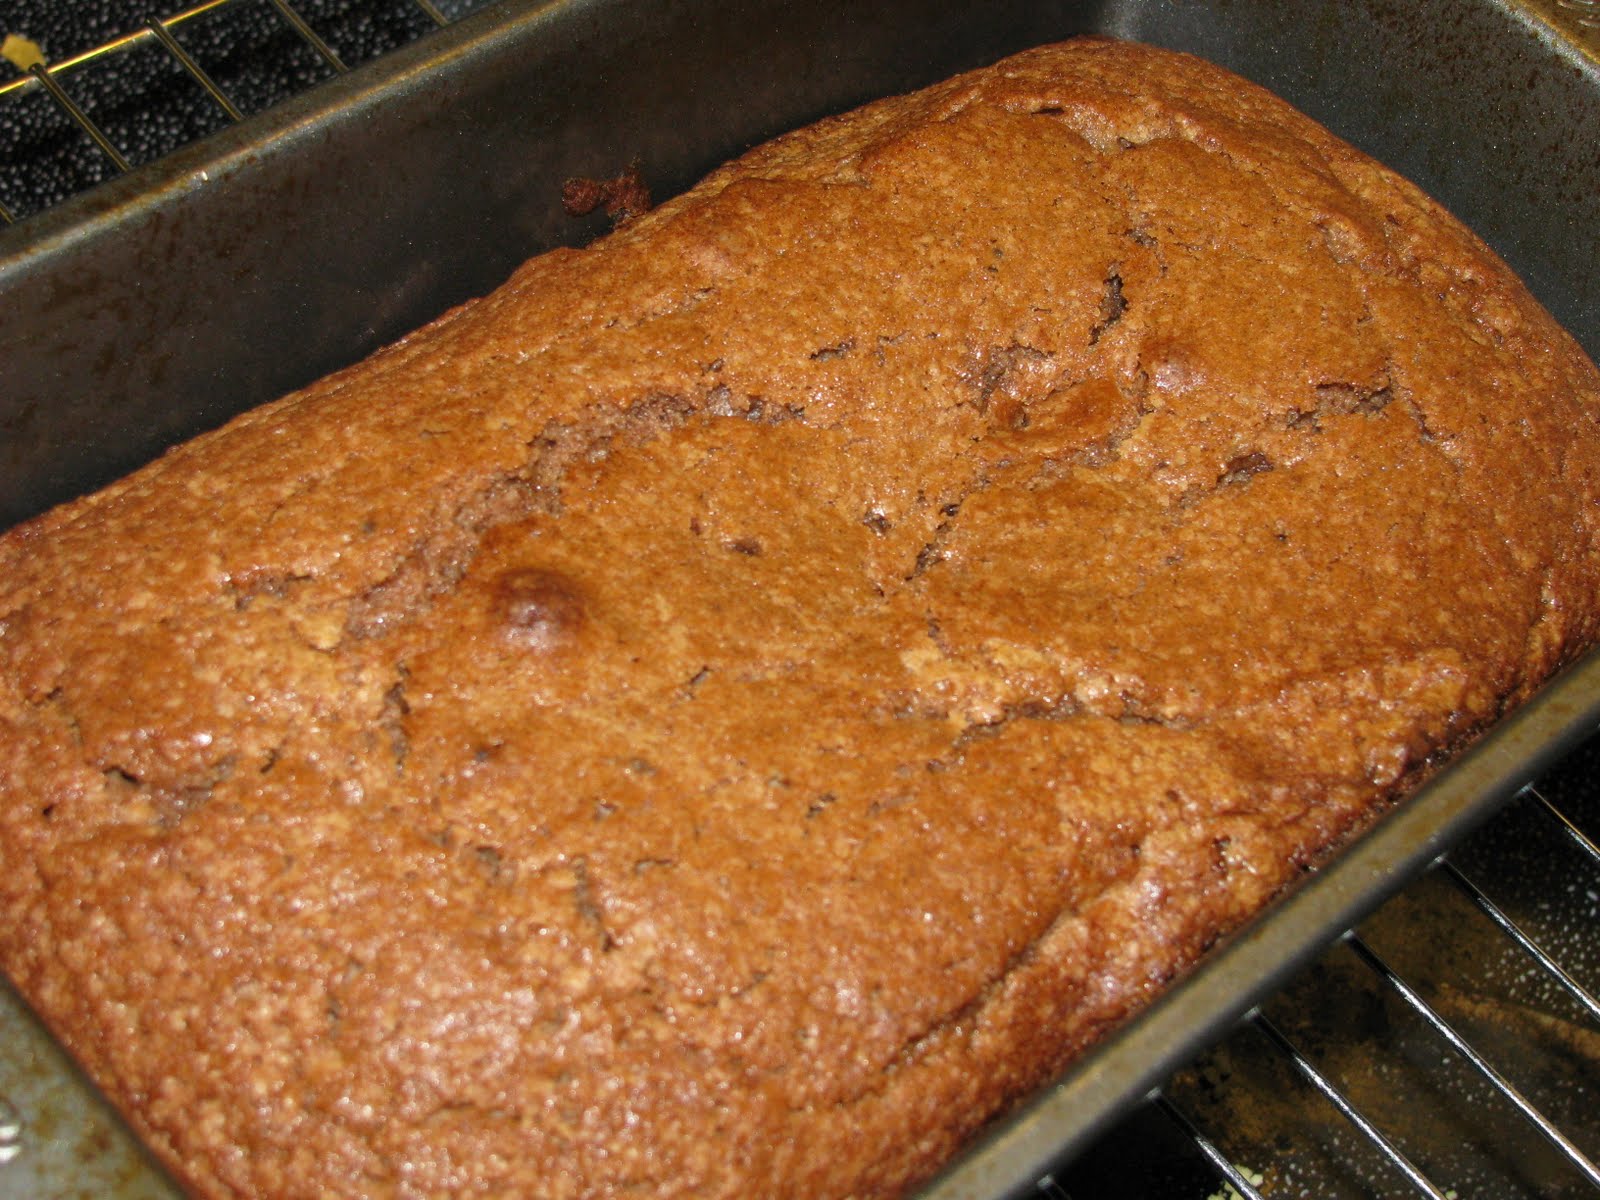
So, for my weekly recipe, we left Italy and, well, stayed here. "Here" meaning the US. I made the Halloween Spice Cake, on the assumption that Halloween as we know it is a very American holiday. Of course, upon making the bread, er, I mean, cake, I thought it wasn't nearly as appropriate for Halloween as for the winter holiday season. Oh well. The interpretation of the theme is loose, okay?

Now, on to the details about the cake. It is easy to prepare. Your typical mix the dry, mix the wet in another bowl, add the dry to the wet, and bake. The problems arose in getting the cake to set. I had read about other folks having the same problem in the reviews of the recipe and scoffed to myself, "Food Network website users--they're probably novice bakers, who don't use oven thermometers, and therefore have no idea that their ovens are running cold." Nope. Not the Food Network website users who have the problem. I think Giada needs to check the temp in HER oven. 40 to 45 minutes? No way. More like 50 to 60.

That said, I baked my cake for 55 minutes, and the middle was still a little squidgy when it was cooled and set up. Blame it on the fact that I was drinking a rather strong Dark & Stormy while it baked. Or just impatience. Or both. But, in the end, it worked out. The squidgy parts are the best now that it has cooled.

The taste of this cake is definitely very spicy. At first bite, I thought, "Wow. This is very strong, and I'm not sure it's all that good." But then I took another bite, and another. And realized that this cake is highly addictive. I think it's the influence of all that ginger. There's an afterburn on your tongue that lingers, and makes you want more. So, I went from the first bite, thinking that this recipe would get a 3 on my 1 to 5 scale (which, in my household means "it was fine, but with so many recipes in the house, why make it again?"), to last bite, thinking that this recipe would get a 4 ("very, very good, and will be made again."). But, a funny thing happens with this cake. I ate a piece for breakfast about two hours ago, and I'm craving another piece now. Really craving it. Talking myself out of it only by reminding myself that I lost two pounds over the last week, and I don't want one spice cake to undo that in one day. Which means that this recipe will probably join my pantheon of quick breads that I take everywhere (the other two, so far, are my Zucchini Bran Bread and a Pumpkin Bread from Wilson Farm--both of which I should probably post about some day). Talk about a sleeper recipe! I never would have expected that at first bite.

So, that's three recipes from Giada that I have made and really enjoyed. Who would have thought? I suppose I'll continue with this group. Maybe she's growing on me after all.

Halloween Spice Cake
Butter, for the pan
1 1/2 cups all-purpose flour
1 teaspoon baking powder
1/2 teaspoon fine sea salt
1 tablespoon unsweetened cocoa powder
1 tablespoon ground cinnamon
2 teaspoons ground ginger
1/2 teaspoon ground nutmeg
1/4 teaspoon ground allspice
1 cup sugar
1/4 cup packed light brown sugar
2/3 cup vegetable oil
1/3 cup unsweetened applesauce (I bought little individual cups so I wouldn't have to open a whole jar)
2 eggs
1 teaspoon pure vanilla extract

Place an oven rack in the center of the oven. Preheat the oven to 350 degrees F. Butter and flour a 9 by 5-inch loaf pan. Set aside.

In a medium bowl, combine the flour, baking powder, salt, cocoa powder, cinnamon, ginger, nutmeg, and allspice.

In a large bowl, beat the sugars, oil, applesauce, eggs, and vanilla extract to blend. Add the dry ingredients and stir until just blended.

Pour the batter into the prepared pan and smooth the top with a spatula. Bake for 40 to 45 minutes or until a toothpick inserted into the center of the cake comes out clean.

Cool the cake for 10 minutes. Unmold the cake and place on a wire rack to cool completely.

IHCC: Halloween Spice Cake


This week's theme over at I Heart Cooking Clubs was "Out of Italy." This means that we were to find a Giada recipe that did not come from Italy. Not an easy feat, given that Ms. De Lauretiss has been dubbed "The Italian Princess" (Wolfgang Puck called her this on The Next Food Network Star this past season). Everything that was overtly from "somewhere else" just didn't appeal to me this week.

So, for my weekly recipe, we left Italy and, well, stayed here. "Here" meaning the US. I made the Halloween Spice Cake, on the assumption that Halloween as we know it is a very American holiday. Of course, upon making the bread, er, I mean, cake, I thought it wasn't nearly as appropriate for Halloween as for the winter holiday season. Oh well. The interpretation of the theme is loose, okay?

Now, on to the details about the cake. It is easy to prepare. Your typical mix the dry, mix the wet in another bowl, add the dry to the wet, and bake. The problems arose in getting the cake to set. I had read about other folks having the same problem in the reviews of the recipe and scoffed to myself, "Food Network website users--they're probably novice bakers, who don't use oven thermometers, and therefore have no idea that their ovens are running cold." Nope. Not the Food Network website users who have the problem. I think Giada needs to check the temp in HER oven. 40 to 45 minutes? No way. More like 50 to 60.

That said, I baked my cake for 55 minutes, and the middle was still a little squidgy when it was cooled and set up. Blame it on the fact that I was drinking a rather strong Dark & Stormy while it baked. Or just impatience. Or both. But, in the end, it worked out. The squidgy parts are the best now that it has cooled.

The taste of this cake is definitely very spicy. At first bite, I thought, "Wow. This is very strong, and I'm not sure it's all that good." But then I took another bite, and another. And realized that this cake is highly addictive. I think it's the influence of all that ginger. There's an afterburn on your tongue that lingers, and makes you want more. So, I went from the first bite, thinking that this recipe would get a 3 on my 1 to 5 scale (which, in my household means "it was fine, but with so many recipes in the house, why make it again?"), to last bite, thinking that this recipe would get a 4 ("very, very good, and will be made again."). But, a funny thing happens with this cake. I ate a piece for breakfast about two hours ago, and I'm craving another piece now. Really craving it. Talking myself out of it only by reminding myself that I lost two pounds over the last week, and I don't want one spice cake to undo that in one day. Which means that this recipe will probably join my pantheon of quick breads that I take everywhere (the other two, so far, are my Zucchini Bran Bread and a Pumpkin Bread from Wilson Farm--both of which I should probably post about some day). Talk about a sleeper recipe! I never would have expected that at first bite.

So, that's three recipes from Giada that I have made and really enjoyed. Who would have thought? I suppose I'll continue with this group. Maybe she's growing on me after all.

Halloween Spice Cake
Butter, for the pan
1 1/2 cups all-purpose flour
1 teaspoon baking powder
1/2 teaspoon fine sea salt
1 tablespoon unsweetened cocoa powder
1 tablespoon ground cinnamon
2 teaspoons ground ginger
1/2 teaspoon ground nutmeg
1/4 teaspoon ground allspice
1 cup sugar
1/4 cup packed light brown sugar
2/3 cup vegetable oil
1/3 cup unsweetened applesauce (I bought little individual cups so I wouldn't have to open a whole jar)
2 eggs
1 teaspoon pure vanilla extract

Place an oven rack in the center of the oven. Preheat the oven to 350 degrees F. Butter and flour a 9 by 5-inch loaf pan. Set aside.

In a medium bowl, combine the flour, baking powder, salt, cocoa powder, cinnamon, ginger, nutmeg, and allspice.

In a large bowl, beat the sugars, oil, applesauce, eggs, and vanilla extract to blend. Add the dry ingredients and stir until just blended.

Pour the batter into the prepared pan and smooth the top with a spatula. Bake for 40 to 45 minutes or until a toothpick inserted into the center of the cake comes out clean.

Cool the cake for 10 minutes. Unmold the cake and place on a wire rack to cool completely.

Kamis, 04 November 2010

Mango Mousse Cake


Ok, so I have been carried away lately with fondant cakes, but I'm back to my, sort of, comfort zone. I was, at first, thinking of making some kind of chocolate banana mousse concoction dessert; however, as I was about to purchase the bananas I saw a glowing yellow bargain... mangoes! Mangoes here in Korea are really pricey, like around $3.50 for two pieces, and being a cheapskate, I'm not willing to pay for it. So when I saw the lovely offer on the reduced rack of the fruit section... I thought, "I've got to have it" - $1 for two pieces, a tad over riped, but perfectly sweet for the dessert I had in mind!


This is what I have come up with - mango mousse cake. So it's a basic mango mousse that is semi-encased with sponge cake. I had a little fun with the sponge cake by marbling some fun tropical colors that still screams 'mango' into it. For a simple finish, I just made a small flower out of sliced mangoes.


This mousse cake is really really light and refreshing; absolutely perfect to finish off a filling meal. There are two main components for this cake: the sponge cake and the mango mousse.


First, the sponge cake.


  1. Make a >Basic Sponge Cake Recipe<, then divide the batter into the amount of different colors you want in your cake then add food coloring in the respective batters. So in my case, three - pink, orange and yellow; note that I have more yellow than pink and orange because I wanted yellow to be the dominant color in the marbled sponge.


  2. I poured the pink, orange and yellow sponge cake batter on a stripe vertical pattern on a lined square pan. Then, I used my spatula to swirl around the batter to create the marbling effect.


  3. After baking, you would notice that the top of the sponge turns into golden brown, but don't worry. Simply use your fingers and gently rub it off, then you will see the lovely marble pattern you have created.


  4. Slice four strips from the sponge cake, this would be used to ring around the inside of your mold. Make sure to measure how thick you want your strips to be. I had mine measured two-thirds of the height of my mold. Place the sponge strips inside each mold.


  5. Cut out circles from the remaining sponge cake to serve as base of your cake. I used the sponge-lined mold to use as a guide for the size of my circle base.


  6. Now you have your sponge case ready to be filled with mousse. Cover the molds with cling, and put them in the fridge while you make your mousse. 


I used to think making mousse is the most complicated thing ever, because when you read recipes of it, it's usually very long. As I make mousse desserts more often, it occurred to me that it's actually quite simple. Like there would be different ratios or mix of ingredients in different recipes as well as different procedures, but when you come down to it, it has almost like a 'generic' way of making a mousse. You just need a lot of mise en place (having all the ingredients needed prepared and set in place) to do.


I have made a mini documentary of how I made my mango mousse, and hopefully I can translate to you how I perceive making a mousse. For me, mousse is a four part dessert: part 1 - whip yolks and sugar, part 2 - add the flavour of your choice and gelatin (if your using), part 3 - fold in the whipped egg whites and part 4 - fold in the whipped cream; et voila! It is simple when you look at it that way right?


Anyway, here's a more detailed guide. For this mango mousse, I opted not to use gelatin.


  1. Mise en place. In picture number 1 there are four bowls, clockwise from top bowl, 2 egg yolks with 34 g sugar, 2 egg whites with 15 g of sugar, 150 g mango puree and 90 ml whipping cream. Now you're ready to whip and fold, whip and fold, whip and fold!


  2. Place everything aside on room temperature except for the cream, put that in the fridge. Get the bowl with the egg yolks and sugar, and place it on top of simmering water. Whip until thick and light in color (ribbon stage).


  3. Mix in the mango puree. If you're using gelatin, this is the part where you add it in as well. Remove from simmering water. Set aside.


  4. Whip the cream, and return it back to the fridge. The reason why I whip the cream before the egg whites is because egg whites deflate faster, so I want to whip the whites as close as possible to when I will use it.


  5. Stir the egg whites with sugar on top of simmering water until the egg whites are warm to touch. Remove from simmering water.


  6. Whip the egg whites until soft peaks form.


  7. Fold a third of the egg whites into the egg yolk-mango puree mixture. The purpose of this step is to lighten the yolk mixture to give it a closer consistency to the rest of the egg whites.


  8. Fold in the rest of the egg whites. Notice I use a whisk to fold, this is just my preference; I find that it incorporates mixtures faster than using spatula. 


  9. Fold in the whipped whipping cream.


  10. Voila, mousse is ready!


 Now that the mousse has been made, it's now time to fill the sponge cakes.


Clockwise from top left picture:


  • Fill the sponge-lined molds with the mango mousse; level the mousse to the top of the mold using an offset spatula to give a smooth finish. (Try to fill the molds neatly, don't be messy like me..) Cover in cling film, and let it chill overnight or until it's set.


  • Once it's set, Take of the cling film. One by one push the bottom of the cake gently to unmold. I used the help of my rolling pin to give a flat support in pushing up my cakes.


  • Voila, the cake can be served as it is or you may add finishing touches. 


These dainty creations really made me happy. It looked good and definitely tasted good! I'm in bliss to have found those mangoes. I've never really yearned for mangoes even if it is a very common fruit from where I grew up, but I guess not having it readily available made me miss them.


I got some left over mousse, so I just filled them on a wine glass and topped it off with a flower made from the rest of the mango slices.


Bisou bisou,


Charlotte