It was a busy busy week for me.
Monday to Thursday, work.
Thursday night, Thanksgiving dinner. The Hubby cooked Turducken (imaging chicken wrapped in ducked wrapped in turkey being baked for 15 hrs). I made a 1-hr dish, sweet potato casserole, with lots of butter and pecan. Just the way southern like it.
Friday, we went to join the Black Friday fun. Amazing how many people were willing to camp outside just to get the best deals. Walmart was insanely packed with people. We decided to make it more crowded. Only by the end of the Black Friday, we finally bought something from Best Buy. The Hubby got one black camera for him, and kindly bought a pink one for me.
Saturday and Sunday, we brought our new cameras to Santa Barbara for two-day getaway. Santa Barbara is beautiful and quiet. Far enough to get away from home, yet near enough to drive less than 4 hr. It was a great break for both of us. We loved using our new cameras, the only down side is human face looks weird in these camera. I got to eat very fresh uni, tacos made from eyes and lips of cows, and coincidently joined a Mexican food fair for fund raising. We visited two nice missions. I learned so much about this historical side of California. And now, our goal is hopefully to visit all the 21 missions in California.
That's how I spent a whole week. Back to work again tomorrow.
XOXO, Fish Fish
|
|
|
|
|---|
Minggu, 28 November 2010
Jumat, 26 November 2010
Daring Bakers' Challenge - November 2010: Crostata
A little update before blogging about my DB challenge: My left hand is still recovering from the burn; it means my hand is still bandaged although not as bad as the picture in my previous post. I now have four of my fingers out of the bandage, and the bandage just goes up to my wrist instead of my arm. I still can't use my left hand normally though because my thumb is positioned in a certain way by the bandage therefore not allowing it to move. Good news is the doctor is happy with the progress of my burn, so pretty soon, I shall be back in the kitchen baking more sweets!

In the meantime, I had my H acting as my sous chef for this challenge. At first I decided to miss out on this month's challenge, but the thought of pastry cream tart alone made me salivate, so I kept on pondering how I could make it happen. Good thing my H volunteered to be my second hand, although I did have some hesitations because my H and I don't work so well in the kitchen arena. His quirks and my quirks don't mesh well in cooking/baking. I'm quite strict, focused and theoretical, while he's more easygoing and experimental. Anyway, despite all that, we gave it a go; everything worked perfectly. He was a good support; he wanted me to make most of this challenge myself, so he was just quietly watching me bake and assist on things he knows I cannot do with one hand i.e. slicing the butter into cubes, scraping the dough that has been stuck on my hand and putting in/taking out the crostata from the oven... oh, and the dishes!

Blog-checking lines: The 2010 November Daring Bakers' challenge was hosted by Simona of briciole. She chose to challenge Daring Bakers' to make pasta frolla for a crostata. She used her own experience as a source, as well as information from Pellegrino Artusi's Science in the Kitchen and the Art of Eating Well.

Crostata is basically an Italian version of a tart, but what makes it a crostata is the use of a specific sweet pastry called pasta frolla. I've become loyal with Martha Stewart's pate brisee recipe when I'm making any sorts of pies and tarts, so to try a new kind of pastry is refreshing. I have to admit that I do kind of like the pasta frolla better than pate brisee. Just a simple reminder for me to not get stuck in my own ways; always try to explore new possibilities of using something else other than what I'm used to, so I have much to thank for from this challenge.

I've thought long and hard as to what filling I should make for my crostata. In the end, the most simple choice warmed my appetite - pastry cream filling; in Italy, this specific crostata is called crostata con la crema. The pasta frolla recipe that our host, Simona, gave us had lemon zest incorporated in the dough, but I decided to use the kiss of orange zest instead. As for my pastry cream, a very classic vanilla pastry cream. So could you just imagine an orange tang of crust topped off with a flow of incredibly creamy vanilla pastry cream? I say that's utter deliciousness!

Oh, I got some leftover pasta frolla dough as well as vanilla pastry cream, so I decided to make it into an empanada. Empanada is a semicircle pie with either savoury or sweet stuffing, which is popular in Spain and Portugal, as well as countries that has been colonized by both countries i.e. Philippines and most Latin countries. Anyway, my empanada was not stuffed but rather filled with vanilla pastry cream; an absolute treat.
Bisou bisou,
Charlotte
Sabtu, 20 November 2010
Antique
I just finished watching an 11-episode Japanese drama.
Antique.
It was adapted from a Japanese manga called "Antique Bakery". I've never read the manga version. But I've watched the Korean movie version, which followed the manga's plot closedly. I did not like the Korean version that much, since I don't know those actors at all. And I don't think their actings were that good.
But this Japanese drama version is totally my thing.
Let's talk about the actors, I like all 4 of them. Especially the one that acted as Keisuke. He is one of the best actors in Japan, and I've never seen him casting in such a comedic role. There are quite a number of "big actors" in this drama. How could I miss that when I was in Japan?
I laughed, cried and felt sweet so much in this drama, that I am also like a dumb, but totally enjoyed it.
The beautiful cakes that they showed in the whole series were already enough to give one enough rush from the infinity combinations of flour, sugar and egg. Don't you just love that sweet, buttery and caramalized aromas released from the oven. I love how our kitchen smelled whenever mom was making cake for Chinese New Year.
Thank you Antique for reminding me how much I loved my kitchen during CNY, and how much I loved Japanese dramas. :)
XOXO, Fish Fish
Selasa, 16 November 2010
Gwyneth Paltrow and Glee
The two things that I have never imagined will my in sync!
I have watched quite a lot of Gwyneth's movies, but none of them really turned my head on her. I know she is smart and talented, but I am never fond of her.
Funny how a high-school musical dramas finally converted me.
I couldn't get the "Forget Me" and "Singing in the Rain/Umbrella" out of my head. LOL
I love her fashion in the "Forget Me", totally my style.
I'll put up the full version of Singing in the Rain/Umbrella when Youtube has it.
Senin, 15 November 2010
CLU: Lentil Soup

The current theme over at Cookbook Lovers Unite is "Warm and Cozy." Daylight savings time has ended. It's dark outside, and, here in New England, it's getting cold. Even on days that reach the 60s during daylight hours, it is dropping into the 20s and 30s at night. I'm not quite sure where summer went. As a matter of fact, I feel like it was just yesterday that I was out picking strawberries. But, somehow, it became November.
This is particularly astonishing to me because I so clearly remember this time last year. I was a bundle (a very large bundle) of anticipation. With each passing week, I was getting more and more anxious to meet my baby. At every store, I'd feel a twinge of nervousness when I saw the holiday displays. That means this baby is really going to arrive!! And now, here I am, with an 11-month-old baby. Where did the time go?
Oh yeah. This post was supposed to be about lentil soup. So, based on the Cookbook Lovers Unite theme, I browsed through my Nigella Lawson cookbooks. Because, to me, when you mention needing a "warm and cozy" recipe, I think of Nigella. There's something so homey and comforting about her books, her personality, her recipes.
I am on a never-ending search for the perfect lentil soup recipe I ate it once, at a restaurant in Florida. I was visiting my Grandma, and it came with my meal. I can't remember the name of the restaurant. I only remember the perfect lentil soup, and the regret I now feel about not asking for the recipe. What was the worst thing? They said no? Now I'll never know.
So, I search and I search. I make lentil soup recipe after lentil soup recipe, and, sadly, it's never the one. This one looked very promising. Pancetta? Scallions? Carrot and celery and garlic, all pureed? Sounded perfect. It wasn't. It was a decent lentil soup. But it wasn't perfect. It wasn't that golden bowl I ate in Florida. And so the search continues.
Lentil Soup
adapted from Feast by Nigella Lawson
4 carrots, roughly chopped
3 oz pancetta or bacon, chopped
6 scallions
1/4 cup chopped parsley
1/4 tsp dried thyme
1 garlic clove
1/4 cup olive oil
1 1/2 cups lentils
2 tsp wholegrain mustard
1 3/4 cups canned chopped tomatoes
8 cups water
Put the carrots into a food processor with pancetta, scallions, parsley, thyme and garlic. Process to a mush, and then heat the oil in a Dutch oven and cook over medium heat, until they are soft.
Stir in the lentils, then add the mustard, tomatoes, and water. Bring to a boil and
simmer gently for 1 hour or thereabouts.
Yield: 10 servings
CLU: Lentil Soup
The current theme over at Cookbook Lovers Unite is "Warm and Cozy." Daylight savings time has ended. It's dark outside, and, here in New England, it's getting cold. Even on days that reach the 60s during daylight hours, it is dropping into the 20s and 30s at night. I'm not quite sure where summer went. As a matter of fact, I feel like it was just yesterday that I was out picking strawberries. But, somehow, it became November.
This is particularly astonishing to me because I so clearly remember this time last year. I was a bundle (a very large bundle) of anticipation. With each passing week, I was getting more and more anxious to meet my baby. At every store, I'd feel a twinge of nervousness when I saw the holiday displays. That means this baby is really going to arrive!! And now, here I am, with an 11-month-old baby. Where did the time go?
Oh yeah. This post was supposed to be about lentil soup. So, based on the Cookbook Lovers Unite theme, I browsed through my Nigella Lawson cookbooks. Because, to me, when you mention needing a "warm and cozy" recipe, I think of Nigella. There's something so homey and comforting about her books, her personality, her recipes.
I am on a never-ending search for the perfect lentil soup recipe I ate it once, at a restaurant in Florida. I was visiting my Grandma, and it came with my meal. I can't remember the name of the restaurant. I only remember the perfect lentil soup, and the regret I now feel about not asking for the recipe. What was the worst thing? They said no? Now I'll never know.
So, I search and I search. I make lentil soup recipe after lentil soup recipe, and, sadly, it's never the one. This one looked very promising. Pancetta? Scallions? Carrot and celery and garlic, all pureed? Sounded perfect. It wasn't. It was a decent lentil soup. But it wasn't perfect. It wasn't that golden bowl I ate in Florida. And so the search continues.
Lentil Soup
adapted from Feast by Nigella Lawson
4 carrots, roughly chopped
3 oz pancetta or bacon, chopped
6 scallions
1/4 cup chopped parsley
1/4 tsp dried thyme
1 garlic clove
1/4 cup olive oil
1 1/2 cups lentils
2 tsp wholegrain mustard
1 3/4 cups canned chopped tomatoes
8 cups water
Put the carrots into a food processor with pancetta, scallions, parsley, thyme and garlic. Process to a mush, and then heat the oil in a Dutch oven and cook over medium heat, until they are soft.
Stir in the lentils, then add the mustard, tomatoes, and water. Bring to a boil and
simmer gently for 1 hour or thereabouts.
Yield: 10 servings
Crack Pie!


This pie from Momofuku Milk Bar in New York has gotten a lot of press in the last few years.. and seeing how I (sadly) wouldn't be going to New York any time soon, I wanted to try it myself! With any of Christina Tosi's recipes I've seen online and in magazines, there are always many many steps to creating the final supersweet product. You gotta WORK for that crazy treat! For instance, with her blueberry and cream cookies, you make the "milk crumbs" first (a milky streusel crumbly thing using dry skim milk powder) and then you incorporate that into the cookie dough. With crack pie, you make a big old super-buttery oat cookie on a sheet pan, bake that off, cool it then you crumble it all up and add more butter and sugar to make a cookie pie crust.
Okay- now on to the crack pie. For my birthday this year I hosted a CANADIAN FOOTBALL AND PIE party... 1 hour of hilarious, muddy football played by non-sporty types in the park right by my house in the November cold, then back to my place for oodles and oodles of pie! Hence, a perfect opportunity to try out this crazy-ass pie...
I ended up making two pies by accident because I thought I messed up the crust on the first go-around. Instead of 1/4 cup butter, I used 1/2 cup because I was so dazed and confused and tired from Cake Land. As it was mixing in my Kitchen Aid, I thought "holy dingdong, that's a lot of butter. that looks nothing like a cookie dough." I used an off-set spatula to spread the "buttery oat cookie mass" onto my cookie sheet. While it was in the oven and looking like maybe a pale sheet of barf, I realized my mistake and quickly made up another batch with 1/4 cup butter instead, spreading it again on a new cookie sheet and baking it. Still, the 1/4 cup butter version looked pretty much exactly the same, pale and somewhat barfy, and baked up the same too -- it really does crisp up and form a giant sheet cookie!
The filling is a breeze to prepare, in fact the whole process isn't difficult per say it just takes a little bit of your time. I poured the filling into both prepared pie shells, then put them in the oven, for 30 minute at 350 degrees. Then the recipe tells you to reduce to 325 degrees for another 20 minutes. Here is where I would suggest watching your oven -- I found I didn't need the entire cooking time, so bake for another 10 minutes and see what's happening. If it's somewhat browned, not quite set in the middle and has some bubbly-type things, take it out!
Let cool for 2 hours, then into the fridge uncovered overnight.
The recipe says to serve cold, but when I tried a teensy slice cold, I thought it was GROSS! The crust was like a hardened chunk of butter in my mouth and I actually spit it out. BUT, when I served both pies later at room temperature, it was CRAZY DELICIOUS! Crust stayed crisp, so yummy with the sweet and salty oats, and the filling was thick but somewhat oozy and brown sugar-sweet. You DEFINITELY need to dust this with icing sugar for presentation because it is not a beauty pageant winner otherwise! I put a single raspberry in the middle of mine too, to jazz it up. And as an annotation, I liked it served at room temperature better than served cold... you can decide for yourself though.
{ CRACK PIE recipe, from Bon Appetit }
INGREDIENTS
OAT COOKIE CRUST
• Nonstick vegetable oil spray
• 9 tablespoons (1 stick plus 1 tablespoon) unsalted butter, room temperature, divided
• 5 1/2 tablespoons (packed) golden brown sugar, divided
• 2 tablespoons sugar
• 1 large egg
• 3/4 cup plus 2 tablespoons old-fashioned oats
• 1/2 cup all purpose flour
• 1/8 teaspoon baking powder
• 1/8 teaspoon baking soda
• 1/4 teaspoon (generous) salt
FILLING
• 3/4 cup sugar
• 1/2 cup (packed) golden brown sugar
• 1 tablespoon nonfat dry milk powder
• 1/4 teaspoon salt
• 1/2 cup (1 stick) unsalted butter, melted, cooled slightly
• 6 1/2 tablespoons heavy whipping cream
• 4 large egg yolks
• 1 teaspoon vanilla extract
• Powdered sugar (for dusting)
PREPARATION
OAT COOKIE CRUST
• Preheat oven to 350°F. Line 13x9x2-inch metal baking pan with parchment paper; coat with nonstick spray. Combine 6 tablespoons butter, 4 tablespoons brown sugar, and 2 tablespoons sugar in medium bowl. Using electric mixer, beat mixture until light and fluffy, occasionally scraping down sides of bowl, about 2 minutes. Add egg; beat until pale and fluffy. Add oats, flour, baking powder, baking soda, and salt and beat until well blended, about 1 minute. Turn oat mixture out onto prepared baking pan; press out evenly to edges of pan. Bake until light golden on top, 17 to 18 minutes. Transfer baking pan to rack and cool cookie completely.
• Using hands, crumble oat cookie into large bowl; add 3 tablespoons butter and 1 1/2 tablespoons brown sugar. Rub in with fingertips until mixture is moist enough to stick together. Transfer cookie crust mixture to 9-inch-diameter glass pie dish. Using fingers, press mixture evenly onto bottom and up sides of pie dish. Place pie dish with crust on rimmed baking sheet.
FILLING
• Position rack in center of oven and preheat to 350°F. Whisk both sugars, milk powder, and salt in medium bowl to blend. Add melted butter and whisk until blended. Add cream, then egg yolks and vanilla and whisk until well blended. Pour filling into crust. Bake pie 30 minutes (filling may begin to bubble). Reduce oven temperature to 325°F. Continue to bake pie until filling is brown in spots and set around edges but center still moves slightly when pie dish is gently shaken, about 20 minutes longer. Cool pie 2 hours in pie dish on rack. Chill uncovered overnight. DO AHEAD Can be made 2 days ahead. Cover; keep chilled.
• Sift powdered sugar lightly over top of pie. Cut pie into wedges and serve cold. (though I thought it was better at room temp).
Minggu, 14 November 2010
IHCC: Italian Baked Chicken and Pastina Casserole

This week's theme at I Heart Cooking Clubs is "Kid at Heart." I immediately knew which Giada recipe I was going to make. Why? Because the word "pastina" was in the title.
Pastina, to me, is quintessential kid food. It's tiny and cute. And it was one of my favorites when I was a child. My favorite Campbell's soup was, by far, chicken and stars. I just loved the itty bitty stars floating in there, and how they practically melted on my tongue. My mom used to make me pastina boiled in her chicken soup when I was sick. The restorative powers of the soup and the fun bits of pasta always made me feel at least a little better.
There's something about the texture that tiny pasta creates that I just love. I remember, when I was an early teen, discovering couscous. I had it for the first time in the Moroccan restaurant at Epcot Center. It was a revelation to me--a dish made solely of tiny pasta? And used in place of the (in my eyes, disgusting) mashed potatoes you see so often in America? Sign me up! I've been a couscous aficionado ever since.
This recipe was so promising. I mean, how can you go wrong with tiny pasta, cubes of chicken, mozzarella cheese, and breadcrumbs? You can't, really. But this recipe tried hard. It really turned out to be no more than the sum of its parts. Pastina? Check. Tomatoes? Check. Mozzarella? Yup, that's what's sticking to the roof of my mouth. Chicken? Uh-huh. But, there was just so unifying element that brought it all together. Instead, you just felt like you were eating a bowl of little pasta, tomatoes, chicken, cheese, and breadcrumbs. Nothing special. Kind of bland. Oh well.
Here's the recipe. I will say this--the bland flavors probably make this great kid food. I can see a picky four-year-old loving it. It's the adults who will be kind of disappointed.
Italian Baked Chicken and Pastina Casserole
from Everyday Pasta by Giada DeLaurentiis
1 cup pastina pasta (or any small pasta)
2 tablespoons olive oil
1/2 cup cubed chicken breast (1-inch cubes)
1/2 cup diced onion (about 1/2 a small onion)
1 clove garlic, minced
1 (14.5-ounce) can diced tomatoes with juice
1 cup shredded mozzarella
1/4 cup chopped fresh flat-leaf parsley
1/4 teaspoon kosher salt
1/4 teaspoon freshly ground black pepper
1/4 cup bread crumbs
1/4 cup grated Parmesan
1 tablespoon butter, plus more for buttering the baking dish
Preheat the oven to 400 degrees F.
Bring a medium pot of salted water to a boil over high heat. Add the pasta and cook until just tender, stirring occasionally, about 5 minutes. Drain pasta into a large mixing bowl.
Meanwhile, put the olive oil in a medium saute pan over medium heat. Add the chicken and cook for 3 minutes. Add the onions and garlic, stirring to combine, and cook until the onions are soft and the chicken is cooked through, about 5 minutes more. Put the chicken mixture into the bowl with the cooked pasta. Add the canned tomatoes, mozzarella cheese, parsley, salt, and pepper. Stir to combine.
Place the mixture in a buttered 8 by 8 by 2-inch baking dish. In a small bowl mix together the bread crumbs and the Parmesan cheese. Sprinkle over the top of the pasta mixture. Dot the top with small bits of butter. Bake until the top is golden brown, about 30 minutes.
Serves 4
Cost: $1.65 per serving
IHCC: Italian Baked Chicken and Pastina Casserole
This week's theme at I Heart Cooking Clubs is "Kid at Heart." I immediately knew which Giada recipe I was going to make. Why? Because the word "pastina" was in the title.
Pastina, to me, is quintessential kid food. It's tiny and cute. And it was one of my favorites when I was a child. My favorite Campbell's soup was, by far, chicken and stars. I just loved the itty bitty stars floating in there, and how they practically melted on my tongue. My mom used to make me pastina boiled in her chicken soup when I was sick. The restorative powers of the soup and the fun bits of pasta always made me feel at least a little better.
There's something about the texture that tiny pasta creates that I just love. I remember, when I was an early teen, discovering couscous. I had it for the first time in the Moroccan restaurant at Epcot Center. It was a revelation to me--a dish made solely of tiny pasta? And used in place of the (in my eyes, disgusting) mashed potatoes you see so often in America? Sign me up! I've been a couscous aficionado ever since.
This recipe was so promising. I mean, how can you go wrong with tiny pasta, cubes of chicken, mozzarella cheese, and breadcrumbs? You can't, really. But this recipe tried hard. It really turned out to be no more than the sum of its parts. Pastina? Check. Tomatoes? Check. Mozzarella? Yup, that's what's sticking to the roof of my mouth. Chicken? Uh-huh. But, there was just so unifying element that brought it all together. Instead, you just felt like you were eating a bowl of little pasta, tomatoes, chicken, cheese, and breadcrumbs. Nothing special. Kind of bland. Oh well.
Here's the recipe. I will say this--the bland flavors probably make this great kid food. I can see a picky four-year-old loving it. It's the adults who will be kind of disappointed.
Italian Baked Chicken and Pastina Casserole
from Everyday Pasta by Giada DeLaurentiis
1 cup pastina pasta (or any small pasta)
2 tablespoons olive oil
1/2 cup cubed chicken breast (1-inch cubes)
1/2 cup diced onion (about 1/2 a small onion)
1 clove garlic, minced
1 (14.5-ounce) can diced tomatoes with juice
1 cup shredded mozzarella
1/4 cup chopped fresh flat-leaf parsley
1/4 teaspoon kosher salt
1/4 teaspoon freshly ground black pepper
1/4 cup bread crumbs
1/4 cup grated Parmesan
1 tablespoon butter, plus more for buttering the baking dish
Preheat the oven to 400 degrees F.
2 tablespoons olive oil
1/2 cup cubed chicken breast (1-inch cubes)
1/2 cup diced onion (about 1/2 a small onion)
1 clove garlic, minced
1 (14.5-ounce) can diced tomatoes with juice
1 cup shredded mozzarella
1/4 cup chopped fresh flat-leaf parsley
1/4 teaspoon kosher salt
1/4 teaspoon freshly ground black pepper
1/4 cup bread crumbs
1/4 cup grated Parmesan
1 tablespoon butter, plus more for buttering the baking dish
Preheat the oven to 400 degrees F.
Bring a medium pot of salted water to a boil over high heat. Add the pasta and cook until just tender, stirring occasionally, about 5 minutes. Drain pasta into a large mixing bowl.
Meanwhile, put the olive oil in a medium saute pan over medium heat. Add the chicken and cook for 3 minutes. Add the onions and garlic, stirring to combine, and cook until the onions are soft and the chicken is cooked through, about 5 minutes more. Put the chicken mixture into the bowl with the cooked pasta. Add the canned tomatoes, mozzarella cheese, parsley, salt, and pepper. Stir to combine.
Place the mixture in a buttered 8 by 8 by 2-inch baking dish. In a small bowl mix together the bread crumbs and the Parmesan cheese. Sprinkle over the top of the pasta mixture. Dot the top with small bits of butter. Bake until the top is golden brown, about 30 minutes.
Serves 4
Cost: $1.65 per serving
Jumat, 12 November 2010
Baking on Hold
Accidents do happen. Unfortunately second time around for my poor left hand... First time, burnt by a fireball that exploded from my gas oven; this time, hot wax got splattered around the skin between my thumb and index finger.

The bandage the hospital wrapped on me makes my burn look so tragic (it's not as bad as it looks), but I guess it would help give a speedy recovery. Until then, I have to pause my baking sessions... :(
Bisou bisou,
Charlotte
Kamis, 11 November 2010
PANTALOON THE BAKING POODLE


There are three things that I love: vintage poodle illustration and objects, ANIMALS wearing human clothing... and CAKES. Combine the three and you have... PANTALOON! The best name for a poodle ever (Pants!). And look at his adorable face! He's a friendly guy! No scary looking poodle here!
If anyone ever sent this vintage children's book to me, I would be the happiest person ever!
Images from flickr.
If anyone ever sent this vintage children's book to me, I would be the happiest person ever!
Images from flickr.
Banana-Coconut Centered Chocolate Mousse
I've been meaning to make this cake for the longest time; finally, I've got around doing it. I encountered this concoction from a chef who once worked at one of my favourite patisseries back home. Unfortunately, I managed to loose the copy of the recipe, so I had to search hard on memory lane as to what components are in the cake and give my own take on this creation. I'm not sure if I got everything on my cake, but regardless, the cake was fantastic!


The cake is composed of layers of dacquoise, coconut jelly, caramelized bananas and milk chocolate mousse; it is then coated with a nice blanket of white chocolate ganache, then decorated with chocolate panels and chocolate curls. Yes, it seems like it has so much flavours going on, but it does come together nicely. Imagine a chocolate banana smoothie on a cake, but a lot lot better!
Bisou bisou,
Charlotte
Senin, 08 November 2010
Baker's Coconut Cut Up Cakes!
 Perfectly cute. Looks like he's made of granola.
 This Santa is just about the coolest cake dude on the block.
He knows it too.
 Bllllassst off!!! We're goin' to Pluto! (My cake would say CANADA)
 Beautiful indeed! Love those lines of dyed shredded sweetened coconut. And little dollies in jaunty caps riding up to the high heavens!
Minggu, 07 November 2010
IHCC: Halloween Spice Cake
This week's theme over at I Heart Cooking Clubs was "Out of Italy." This means that we were to find a Giada recipe that did not come from Italy. Not an easy feat, given that Ms. De Lauretiss has been dubbed "The Italian Princess" (Wolfgang Puck called her this on The Next Food Network Star this past season). Everything that was overtly from "somewhere else" just didn't appeal to me this week.
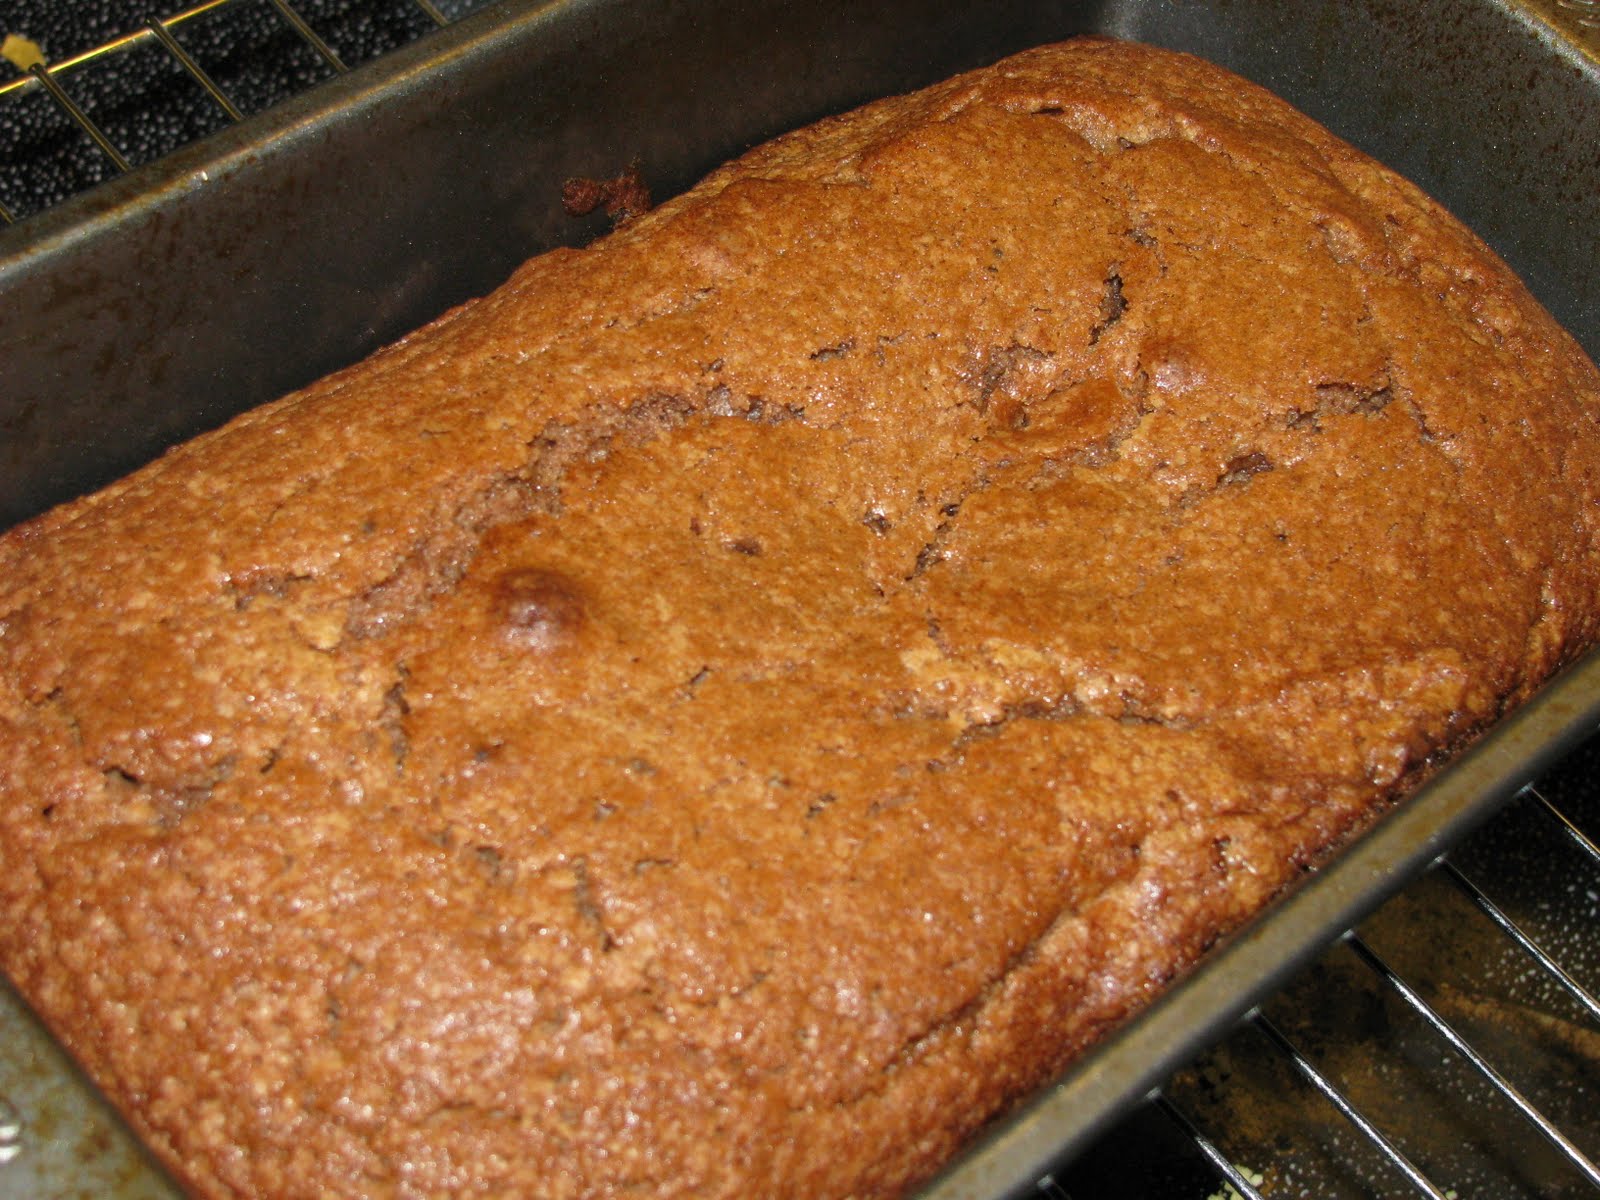
So, for my weekly recipe, we left Italy and, well, stayed here. "Here" meaning the US. I made the Halloween Spice Cake, on the assumption that Halloween as we know it is a very American holiday. Of course, upon making the bread, er, I mean, cake, I thought it wasn't nearly as appropriate for Halloween as for the winter holiday season. Oh well. The interpretation of the theme is loose, okay?
Now, on to the details about the cake. It is easy to prepare. Your typical mix the dry, mix the wet in another bowl, add the dry to the wet, and bake. The problems arose in getting the cake to set. I had read about other folks having the same problem in the reviews of the recipe and scoffed to myself, "Food Network website users--they're probably novice bakers, who don't use oven thermometers, and therefore have no idea that their ovens are running cold." Nope. Not the Food Network website users who have the problem. I think Giada needs to check the temp in HER oven. 40 to 45 minutes? No way. More like 50 to 60.
That said, I baked my cake for 55 minutes, and the middle was still a little squidgy when it was cooled and set up. Blame it on the fact that I was drinking a rather strong Dark & Stormy while it baked. Or just impatience. Or both. But, in the end, it worked out. The squidgy parts are the best now that it has cooled.
The taste of this cake is definitely very spicy. At first bite, I thought, "Wow. This is very strong, and I'm not sure it's all that good." But then I took another bite, and another. And realized that this cake is highly addictive. I think it's the influence of all that ginger. There's an afterburn on your tongue that lingers, and makes you want more. So, I went from the first bite, thinking that this recipe would get a 3 on my 1 to 5 scale (which, in my household means "it was fine, but with so many recipes in the house, why make it again?"), to last bite, thinking that this recipe would get a 4 ("very, very good, and will be made again."). But, a funny thing happens with this cake. I ate a piece for breakfast about two hours ago, and I'm craving another piece now. Really craving it. Talking myself out of it only by reminding myself that I lost two pounds over the last week, and I don't want one spice cake to undo that in one day. Which means that this recipe will probably join my pantheon of quick breads that I take everywhere (the other two, so far, are my Zucchini Bran Bread and a Pumpkin Bread from Wilson Farm--both of which I should probably post about some day). Talk about a sleeper recipe! I never would have expected that at first bite.
So, that's three recipes from Giada that I have made and really enjoyed. Who would have thought? I suppose I'll continue with this group. Maybe she's growing on me after all.
Halloween Spice Cake
from the Food Network Website
Butter, for the pan
1 1/2 cups all-purpose flour
1 teaspoon baking powder
1/2 teaspoon fine sea salt
1 tablespoon unsweetened cocoa powder
1 tablespoon ground cinnamon
2 teaspoons ground ginger
1/2 teaspoon ground nutmeg
1/4 teaspoon ground allspice
1 cup sugar
1/4 cup packed light brown sugar
2/3 cup vegetable oil
1/3 cup unsweetened applesauce (I bought little individual cups so I wouldn't have to open a whole jar)
2 eggs
1 teaspoon pure vanilla extract
Place an oven rack in the center of the oven. Preheat the oven to 350 degrees F. Butter and flour a 9 by 5-inch loaf pan. Set aside.
In a medium bowl, combine the flour, baking powder, salt, cocoa powder, cinnamon, ginger, nutmeg, and allspice.
In a large bowl, beat the sugars, oil, applesauce, eggs, and vanilla extract to blend. Add the dry ingredients and stir until just blended.
Pour the batter into the prepared pan and smooth the top with a spatula. Bake for 40 to 45 minutes or until a toothpick inserted into the center of the cake comes out clean.
Cool the cake for 10 minutes. Unmold the cake and place on a wire rack to cool completely.
IHCC: Halloween Spice Cake
This week's theme over at I Heart Cooking Clubs was "Out of Italy." This means that we were to find a Giada recipe that did not come from Italy. Not an easy feat, given that Ms. De Lauretiss has been dubbed "The Italian Princess" (Wolfgang Puck called her this on The Next Food Network Star this past season). Everything that was overtly from "somewhere else" just didn't appeal to me this week.
So, for my weekly recipe, we left Italy and, well, stayed here. "Here" meaning the US. I made the Halloween Spice Cake, on the assumption that Halloween as we know it is a very American holiday. Of course, upon making the bread, er, I mean, cake, I thought it wasn't nearly as appropriate for Halloween as for the winter holiday season. Oh well. The interpretation of the theme is loose, okay?
Now, on to the details about the cake. It is easy to prepare. Your typical mix the dry, mix the wet in another bowl, add the dry to the wet, and bake. The problems arose in getting the cake to set. I had read about other folks having the same problem in the reviews of the recipe and scoffed to myself, "Food Network website users--they're probably novice bakers, who don't use oven thermometers, and therefore have no idea that their ovens are running cold." Nope. Not the Food Network website users who have the problem. I think Giada needs to check the temp in HER oven. 40 to 45 minutes? No way. More like 50 to 60.
That said, I baked my cake for 55 minutes, and the middle was still a little squidgy when it was cooled and set up. Blame it on the fact that I was drinking a rather strong Dark & Stormy while it baked. Or just impatience. Or both. But, in the end, it worked out. The squidgy parts are the best now that it has cooled.
The taste of this cake is definitely very spicy. At first bite, I thought, "Wow. This is very strong, and I'm not sure it's all that good." But then I took another bite, and another. And realized that this cake is highly addictive. I think it's the influence of all that ginger. There's an afterburn on your tongue that lingers, and makes you want more. So, I went from the first bite, thinking that this recipe would get a 3 on my 1 to 5 scale (which, in my household means "it was fine, but with so many recipes in the house, why make it again?"), to last bite, thinking that this recipe would get a 4 ("very, very good, and will be made again."). But, a funny thing happens with this cake. I ate a piece for breakfast about two hours ago, and I'm craving another piece now. Really craving it. Talking myself out of it only by reminding myself that I lost two pounds over the last week, and I don't want one spice cake to undo that in one day. Which means that this recipe will probably join my pantheon of quick breads that I take everywhere (the other two, so far, are my Zucchini Bran Bread and a Pumpkin Bread from Wilson Farm--both of which I should probably post about some day). Talk about a sleeper recipe! I never would have expected that at first bite.
So, that's three recipes from Giada that I have made and really enjoyed. Who would have thought? I suppose I'll continue with this group. Maybe she's growing on me after all.
Halloween Spice Cake
from the Food Network Website
Butter, for the pan
1 1/2 cups all-purpose flour
1 teaspoon baking powder
1/2 teaspoon fine sea salt
1 tablespoon unsweetened cocoa powder
1 tablespoon ground cinnamon
2 teaspoons ground ginger
1/2 teaspoon ground nutmeg
1/4 teaspoon ground allspice
1 cup sugar
1/4 cup packed light brown sugar
2/3 cup vegetable oil
1/3 cup unsweetened applesauce (I bought little individual cups so I wouldn't have to open a whole jar)
2 eggs
1 teaspoon pure vanilla extract
Place an oven rack in the center of the oven. Preheat the oven to 350 degrees F. Butter and flour a 9 by 5-inch loaf pan. Set aside.
1 1/2 cups all-purpose flour
1 teaspoon baking powder
1/2 teaspoon fine sea salt
1 tablespoon unsweetened cocoa powder
1 tablespoon ground cinnamon
2 teaspoons ground ginger
1/2 teaspoon ground nutmeg
1/4 teaspoon ground allspice
1 cup sugar
1/4 cup packed light brown sugar
2/3 cup vegetable oil
1/3 cup unsweetened applesauce (I bought little individual cups so I wouldn't have to open a whole jar)
2 eggs
1 teaspoon pure vanilla extract
Place an oven rack in the center of the oven. Preheat the oven to 350 degrees F. Butter and flour a 9 by 5-inch loaf pan. Set aside.
In a medium bowl, combine the flour, baking powder, salt, cocoa powder, cinnamon, ginger, nutmeg, and allspice.
In a large bowl, beat the sugars, oil, applesauce, eggs, and vanilla extract to blend. Add the dry ingredients and stir until just blended.
Pour the batter into the prepared pan and smooth the top with a spatula. Bake for 40 to 45 minutes or until a toothpick inserted into the center of the cake comes out clean.
Cool the cake for 10 minutes. Unmold the cake and place on a wire rack to cool completely.
Kamis, 04 November 2010
Mango Mousse Cake
Ok, so I have been carried away lately with fondant cakes, but I'm back to my, sort of, comfort zone. I was, at first, thinking of making some kind of chocolate banana mousse concoction dessert; however, as I was about to purchase the bananas I saw a glowing yellow bargain... mangoes! Mangoes here in Korea are really pricey, like around $3.50 for two pieces, and being a cheapskate, I'm not willing to pay for it. So when I saw the lovely offer on the reduced rack of the fruit section... I thought, "I've got to have it" - $1 for two pieces, a tad over riped, but perfectly sweet for the dessert I had in mind!

This is what I have come up with - mango mousse cake. So it's a basic mango mousse that is semi-encased with sponge cake. I had a little fun with the sponge cake by marbling some fun tropical colors that still screams 'mango' into it. For a simple finish, I just made a small flower out of sliced mangoes.

This mousse cake is really really light and refreshing; absolutely perfect to finish off a filling meal. There are two main components for this cake: the sponge cake and the mango mousse.
First, the sponge cake.

Make a >Basic Sponge Cake Recipe<, then divide the batter into the amount of different colors you want in your cake then add food coloring in the respective batters. So in my case, three - pink, orange and yellow; note that I have more yellow than pink and orange because I wanted yellow to be the dominant color in the marbled sponge.
I poured the pink, orange and yellow sponge cake batter on a stripe vertical pattern on a lined square pan. Then, I used my spatula to swirl around the batter to create the marbling effect.
After baking, you would notice that the top of the sponge turns into golden brown, but don't worry. Simply use your fingers and gently rub it off, then you will see the lovely marble pattern you have created.
Slice four strips from the sponge cake, this would be used to ring around the inside of your mold. Make sure to measure how thick you want your strips to be. I had mine measured two-thirds of the height of my mold. Place the sponge strips inside each mold.
Cut out circles from the remaining sponge cake to serve as base of your cake. I used the sponge-lined mold to use as a guide for the size of my circle base.
Now you have your sponge case ready to be filled with mousse. Cover the molds with cling, and put them in the fridge while you make your mousse.

I used to think making mousse is the most complicated thing ever, because when you read recipes of it, it's usually very long. As I make mousse desserts more often, it occurred to me that it's actually quite simple. Like there would be different ratios or mix of ingredients in different recipes as well as different procedures, but when you come down to it, it has almost like a 'generic' way of making a mousse. You just need a lot of mise en place (having all the ingredients needed prepared and set in place) to do.
I have made a mini documentary of how I made my mango mousse, and hopefully I can translate to you how I perceive making a mousse. For me, mousse is a four part dessert: part 1 - whip yolks and sugar, part 2 - add the flavour of your choice and gelatin (if your using), part 3 - fold in the whipped egg whites and part 4 - fold in the whipped cream; et voila! It is simple when you look at it that way right?
Anyway, here's a more detailed guide. For this mango mousse, I opted not to use gelatin.

Mise en place. In picture number 1 there are four bowls, clockwise from top bowl, 2 egg yolks with 34 g sugar, 2 egg whites with 15 g of sugar, 150 g mango puree and 90 ml whipping cream. Now you're ready to whip and fold, whip and fold, whip and fold!
Place everything aside on room temperature except for the cream, put that in the fridge. Get the bowl with the egg yolks and sugar, and place it on top of simmering water. Whip until thick and light in color (ribbon stage).
Mix in the mango puree. If you're using gelatin, this is the part where you add it in as well. Remove from simmering water. Set aside.
Whip the cream, and return it back to the fridge. The reason why I whip the cream before the egg whites is because egg whites deflate faster, so I want to whip the whites as close as possible to when I will use it.
Stir the egg whites with sugar on top of simmering water until the egg whites are warm to touch. Remove from simmering water.
Whip the egg whites until soft peaks form.
Fold a third of the egg whites into the egg yolk-mango puree mixture. The purpose of this step is to lighten the yolk mixture to give it a closer consistency to the rest of the egg whites.
Fold in the rest of the egg whites. Notice I use a whisk to fold, this is just my preference; I find that it incorporates mixtures faster than using spatula.
Fold in the whipped whipping cream.
Voila, mousse is ready!

Now that the mousse has been made, it's now time to fill the sponge cakes.

Clockwise from top left picture:
Fill the sponge-lined molds with the mango mousse; level the mousse to the top of the mold using an offset spatula to give a smooth finish. (Try to fill the molds neatly, don't be messy like me..) Cover in cling film, and let it chill overnight or until it's set.
Once it's set, Take of the cling film. One by one push the bottom of the cake gently to unmold. I used the help of my rolling pin to give a flat support in pushing up my cakes.
Voila, the cake can be served as it is or you may add finishing touches.

These dainty creations really made me happy. It looked good and definitely tasted good! I'm in bliss to have found those mangoes. I've never really yearned for mangoes even if it is a very common fruit from where I grew up, but I guess not having it readily available made me miss them.

I got some left over mousse, so I just filled them on a wine glass and topped it off with a flower made from the rest of the mango slices.
Bisou bisou,
Charlotte
Rabu, 03 November 2010
Udon-Shiitake Stir-Fry with Sake and Ginger

As you can probably tell from my post about Homemade Lo Mein, I love Asian noodle dishes. I love lo mein. I love pad thai. I love rice noodles. I love udon noodles, in all their incarnations, from a soupy bowl full of veggies and broth, to a savory saute with a sauce. So, when I found the recipe for Udon-Shiitake Stir-Fry with Sake and Ginger in Vegan Planet, I knew I had to make it.
I hit noodle gold with this recipe. The sauce is sweet from the shiitake and agave, yet earthy from the mushrooms and sesame oil. The shiitakes are silky and a little meaty while the udon noodles are wonderfully chewy. At the end of each mouthful, the ginger lends a bracing bite.
These noodles were as good as any I can get at an Asian restaurant in my area. And the recipe is so fast to make that it is on the table before take-out could possibly be. I know these noodles will become a regular in my household.
Udon-Shiitake Stir-Fry with Sake and Ginger
adapted from Vegan Planet by Robin Robertson
12 oz udon noodles
2 tsp. sesame oil
3 Tbs. sake
3 Tbs. tamari or other soy sauce
2 Tbs. agave syrup
2 Tbs. vegetable oil
2 shallots, finely chopped
8 oz fresh shiitake mushrooms, stems removed, and caps thinly sliced
1 Tbs peeled and minced fresh ginger
1. Cook the udon noodles according to package directions. Drain and toss with sesame oil. Set aside.
2. In a small bowl, combine the sake, tamari, and agave until well blended. Set aside.
3. Heat the oil in a large skillet or wok over medium-high heat. Add teh shallots, mushrooms, and ginger, and stir-fry until the mushrooms are tender, about 3 minutes.
4. Stir in the sake mixture and udon noodles, and cook, stirring, until heated through, 3 to 5 minutes. Serve hot.
This says it serves 4. In my house, it only served 2. We didn't have any sides or salad, so perhaps that is why.
Udon-Shiitake Stir-Fry with Sake and Ginger
As you can probably tell from my post about Homemade Lo Mein, I love Asian noodle dishes. I love lo mein. I love pad thai. I love rice noodles. I love udon noodles, in all their incarnations, from a soupy bowl full of veggies and broth, to a savory saute with a sauce. So, when I found the recipe for Udon-Shiitake Stir-Fry with Sake and Ginger in Vegan Planet, I knew I had to make it.
I hit noodle gold with this recipe. The sauce is sweet from the shiitake and agave, yet earthy from the mushrooms and sesame oil. The shiitakes are silky and a little meaty while the udon noodles are wonderfully chewy. At the end of each mouthful, the ginger lends a bracing bite.
These noodles were as good as any I can get at an Asian restaurant in my area. And the recipe is so fast to make that it is on the table before take-out could possibly be. I know these noodles will become a regular in my household.
Udon-Shiitake Stir-Fry with Sake and Ginger
adapted from Vegan Planet by Robin Robertson
12 oz udon noodles
2 tsp. sesame oil
3 Tbs. sake
3 Tbs. tamari or other soy sauce
2 Tbs. agave syrup
2 Tbs. vegetable oil
2 shallots, finely chopped
8 oz fresh shiitake mushrooms, stems removed, and caps thinly sliced
1 Tbs peeled and minced fresh ginger
1. Cook the udon noodles according to package directions. Drain and toss with sesame oil. Set aside.
2. In a small bowl, combine the sake, tamari, and agave until well blended. Set aside.
3. Heat the oil in a large skillet or wok over medium-high heat. Add teh shallots, mushrooms, and ginger, and stir-fry until the mushrooms are tender, about 3 minutes.
4. Stir in the sake mixture and udon noodles, and cook, stirring, until heated through, 3 to 5 minutes. Serve hot.
This says it serves 4. In my house, it only served 2. We didn't have any sides or salad, so perhaps that is why.
Langganan:
Postingan (Atom)